How does the portal works ?
- Available with
- Free
- Tailored
- Team
Enhanced Customer Portal
The enhanced customer portal, introduced in iTop 2.3.0, is used by customers to easily create and track user request and incident tickets. The portal provides simplified interface to manage such tickets.
The portal supports two user profiles:
-
Portal users are allowed to see only the tickets they have submitted
-
Portal power users are allowed to see all the tickets of their organization (and the sub-organizations)
Home page
The user interface of the portal is designed to automatically adjust its presentation depending on the size of the screen. Therefore the content and disposition of the various elements may vary depending on the device used to connect to the portal. However all the features of the portal are available on all screen sizes.
For example, on a typical laptop, with a relatively large screen, the home page of the portal is the following: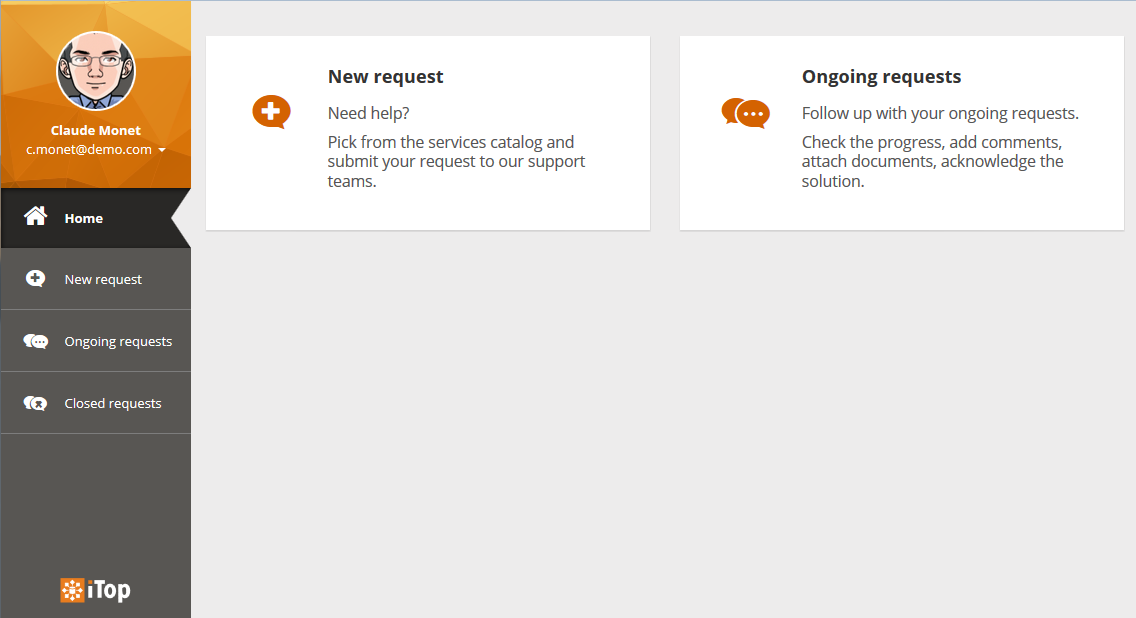
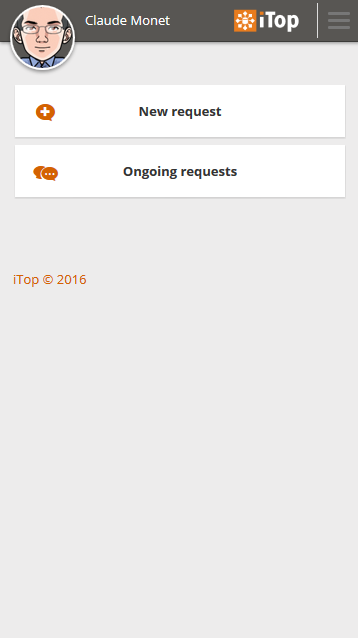
On a smaller screen, for example on a mobile phone, the home page displays as shown below:
Creating a new request
To create a new request, either click on the “New Request” menu on the left of the page, or click on the big new request tile in the home page.
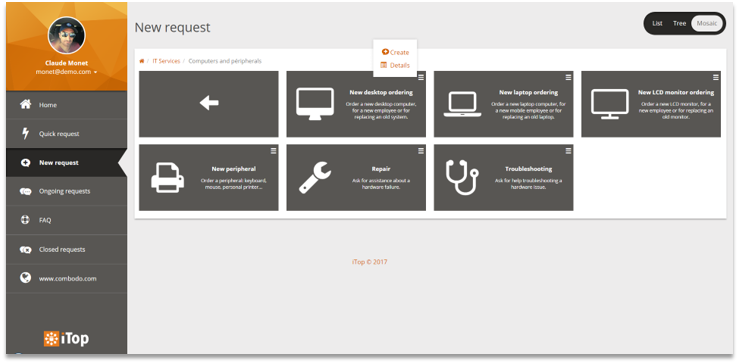
You will then be prompted to select a service and a service category using one of the 3 possible modes:
Mosaic:
Tree:
In this mode you can search for a keyword. On enter, it filter the tree with rows that are matching the keywords.
-
If the keyword match a Service name then all its subcategories will be kept.
-
It is possible that you don't see why a given row is kept, your itop can be configured to search on fields which are not displayed.
List: In this mode you can search for a keyword. On enter, it filter the list with rows that are matching the keywords.
-
It is possible that you don't see why a given row is kept, your itop can be configured to search on fields which are not displayed.
-
If the keyword match a Service name then all its subcategories will be kept.
If you have no Services proposed, ask your administrator to check: Troubleshooting
You can switch from one mode to another using the upper right tabs.
To create a new request, click on the item (Service Subcategory) you want.
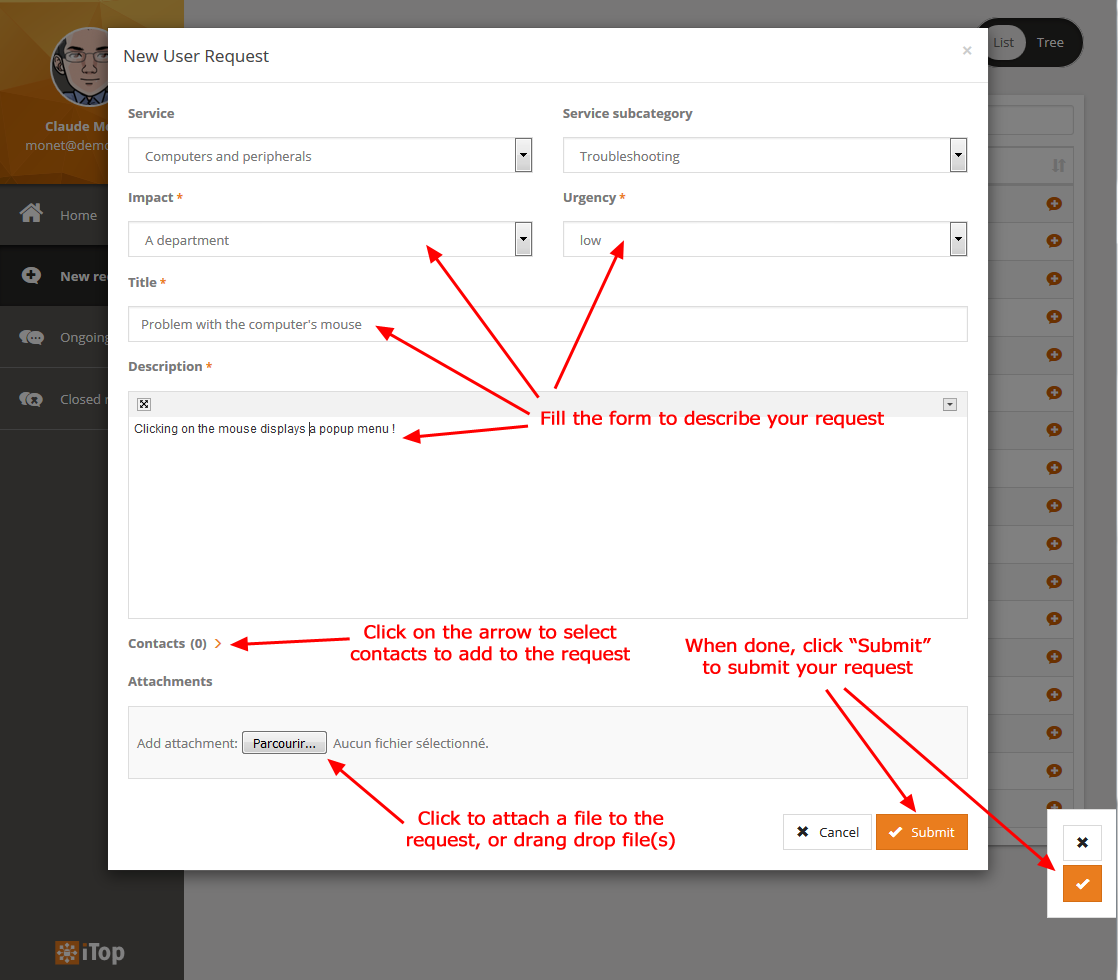
A form is then displayed as a modal dialog. Fill the form and click “Submit” to submit your request. You can attach documents to the request by either dragging and dropping them in the form, or by using the “Browse…” button in the “Attachments” section of the form.
You can include images in the “Description” field by dragging and dropping them within the text (This is not supported on Internet Explorer 9).
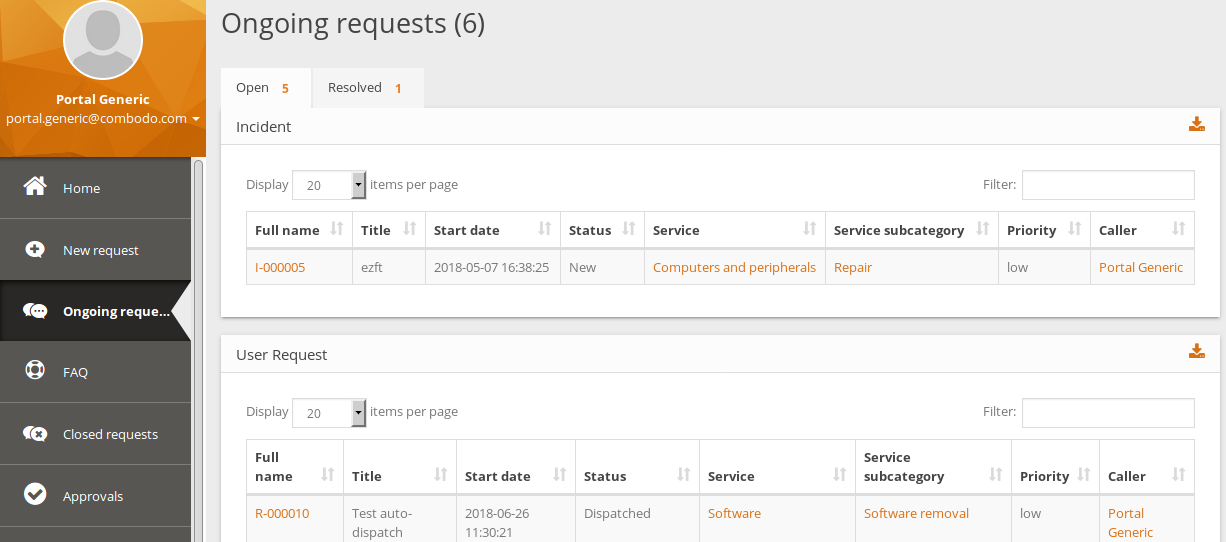
When you submit your request, the display goes back to the list of open requests, with your new request at the top of the list.
Updating an existing request
When a request is not closed, it can still be updated. Using the portal, you can:
-
Add a new entry to the journal of the request, to further explain your need or to answer a question from the support team.
-
Attach new documents to the ticket
-
Re-open a “resolved” request (if you are not satisfied with the resolution).
To update an existing request, first locate this request by clicking on the “Ongoing requests” menu.
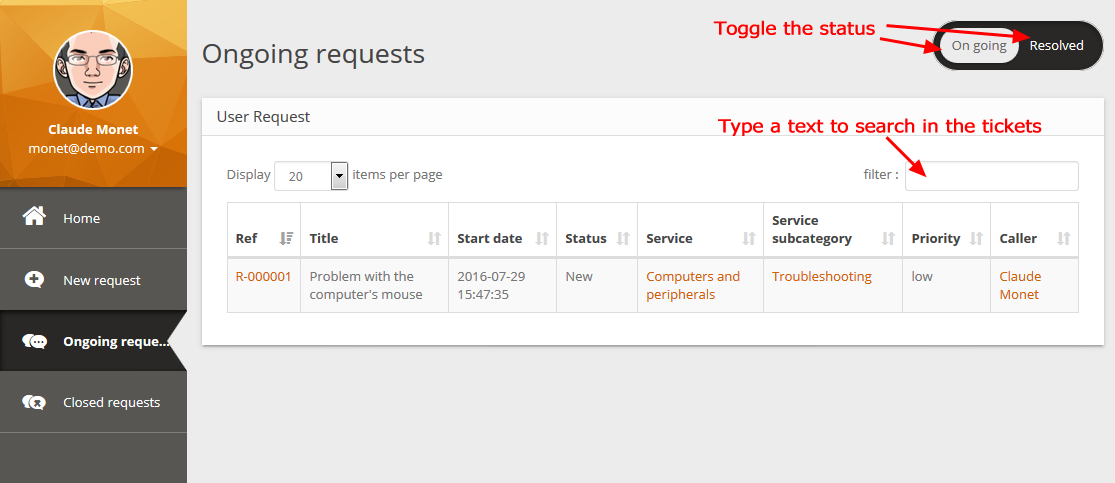
At the top right of the page, notice the “On going / Resolved” toggle. This toggle is used to filter the list of requests displayed. By default the resolved requests are not displayed.
You can use the “filter” input, located at the top right of the list, to search within the list. The filter also searches in the description of the requests, which is not a visible column from the list.
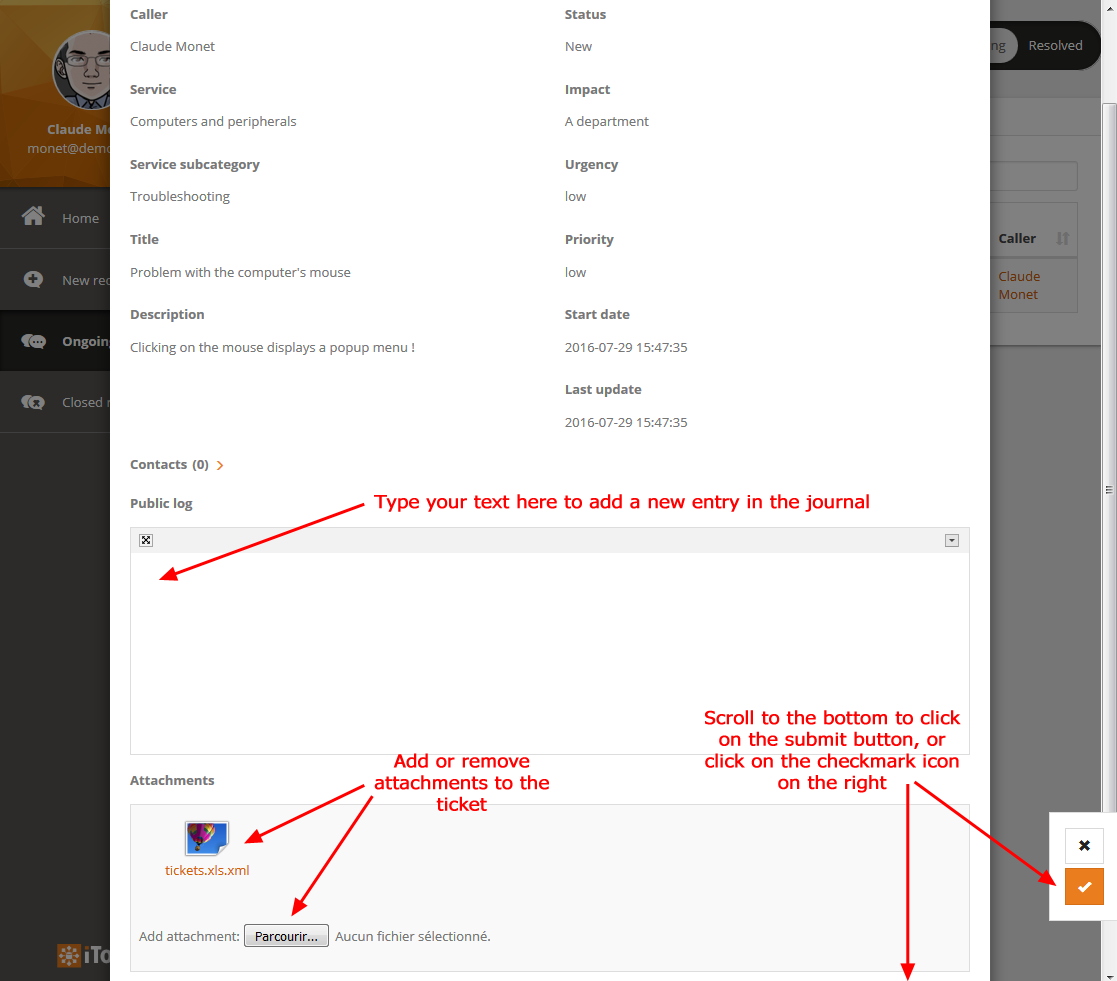
Once you have located the request to edit, click on its reference (“R-000xxx”) to open its details:
The form displayed let you edit the journal and add/remove attachments. When done, use the “Submit” button at the bottom (or the “Check Mark” button on the right) to submit your update.
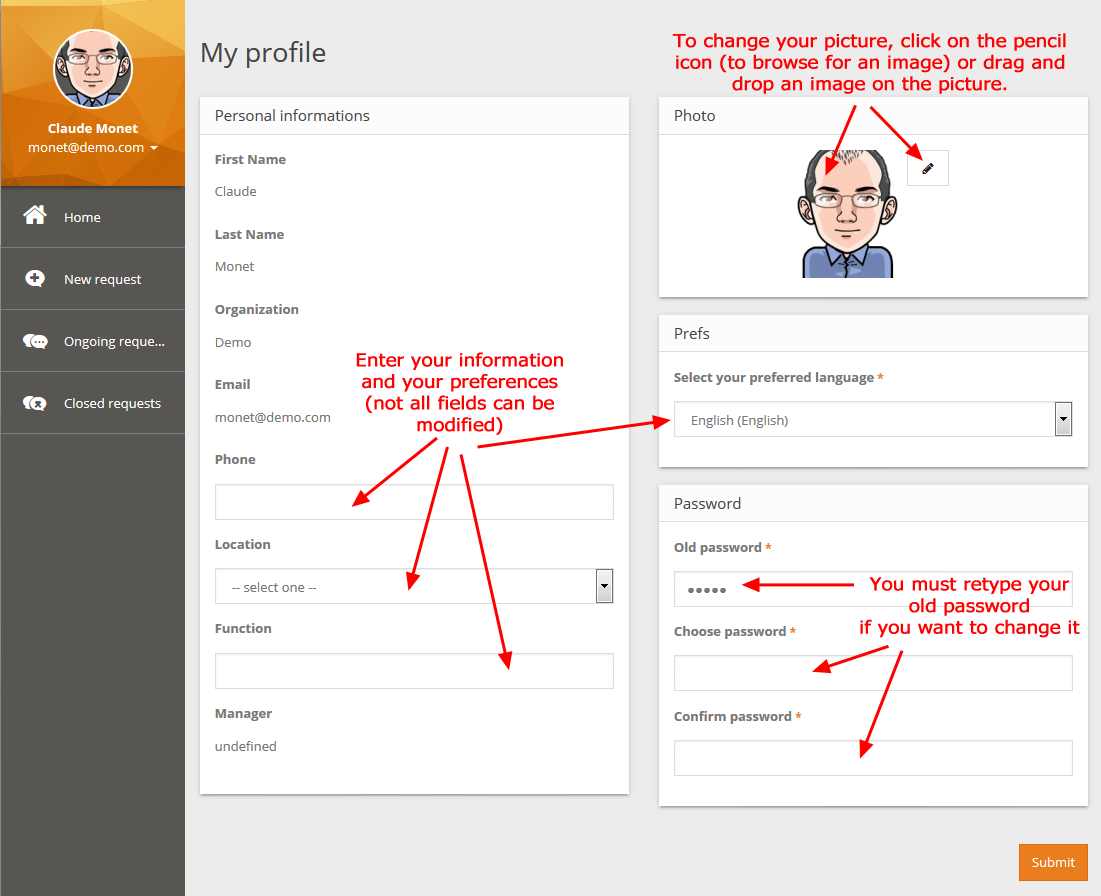
Changing your profile
Customers can edit their profile information from the portal, via the menu named “My Profile”.
The actual list of fields that the end-user is allowed to edit depend on the configuration of the portal. By default itop let end-users edit their phone number, location, function, picture as well as their preferred language.
When passwords are managed outside of iTop (for example when using LDAP or Active Directory based authentication), the password management form is not displayed.
Only the JPEG, PNG and GIF types of images are supported for the “Picture” field.
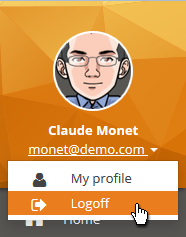
Disconnecting from the portal
To disconnect from the portal, use the “Logoff” menu:
Troubleshooting the Portal
If you get: “No services”, you have forgotten a step of the implementaion Guide
-
Portal user must belong to a Customer A organization
-
Portal user must have Portal user
Profile -
Missing a
Customer Contractfor Customer A -
Missing
Servicesattached to the aboveCustomer Contract -
Missing
Service Familyon yourServices -
Missing
Service Sub-categoriesunder yourServices -
Servicehas undefinedStatusor isobsolete -
Service Sub-categoryhas undefinedStatusor isobsolete
You still have unanswered questions ? Ask us.
Give, get, ask…
Join our community of users to share your knowledge and good practices.


