Manage your preferences
- Available with
- Free
- Tailored
- Team
Managing your Preferences
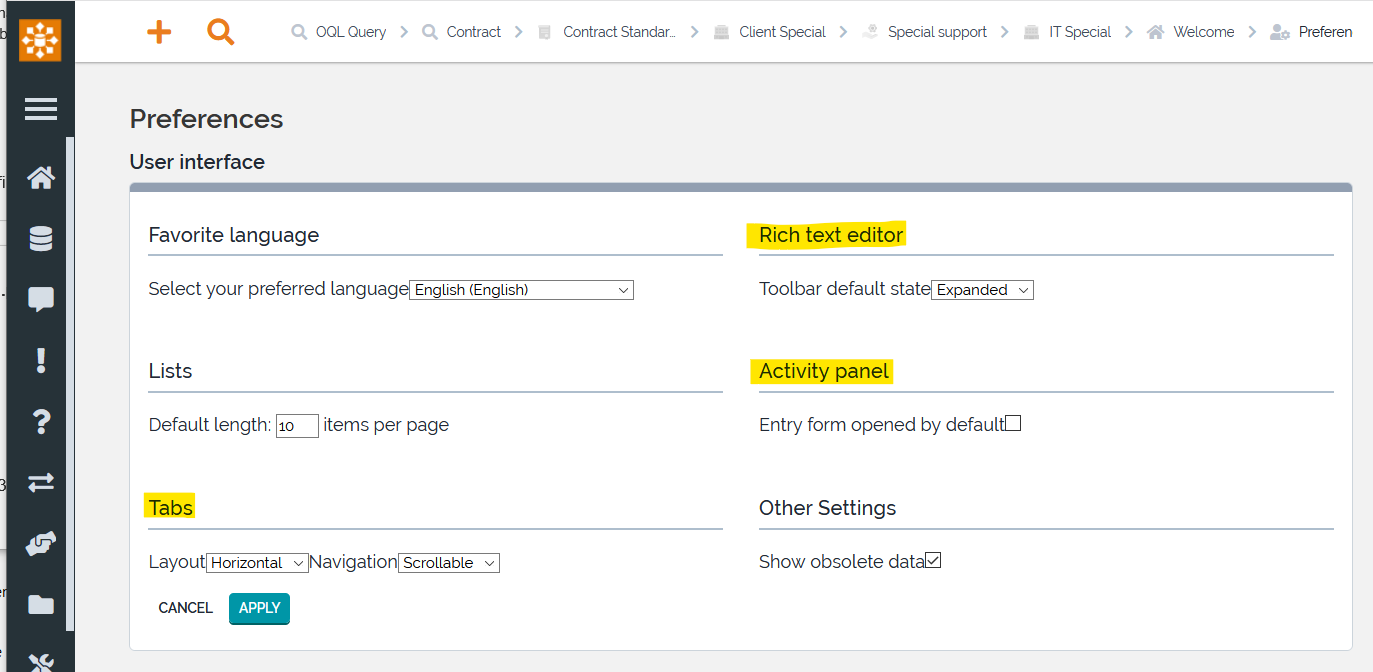
The Preferences menu allows each user to configure:
-
The language for the iTop user interface
-
The default length for displaying any list of search results
-
The option Show obsolete data unchecked by default, allow to display obsolete objects in drop-down lists and search results
-
The list of favorite Organizations to be displayed in the context menu
-
The Personal shortcuts created by the user
All the settings managed in this page only apply to the current user.
Language
To change the language of the user interface, select the desired language from the drop-down list and click on Apply.
Other settings
The Default length for lists is used to limit the display size of the lists of objects; for example, when performing a search. If the number of elements in the list exceeds this value, the list will display the objects by page. Each page is configured by default to display the default length number of objects. Displaying more objects per page may be more convenient but will slow down the display.
This length is also used to limit the history of CSV imports (truncated view).
To modify the default value, change the number then click Apply.
This value is the default that applies to all lists that do not have a specific configuration. (See Manage Lists for how to configure a specific list).
Favorite organizations
In large companies, not all users are interested by all organizations documented in iTop (for example if a given user works only for a given set of customers). This setting let each user tailor the list of organizations that appear in the context menu at the top-left of their iTop pages, in order to ease the navigation in the application.
Shortcuts
Use this to rename or delete user-created shortcuts. (See FAQ:-7 for how to create shortcuts). The shortcuts appear in the main menu immediately below the Welcome menu. To rename a shortcut, check the checkbox in front of its name and click on Rename. To delete shortcuts, check the checkboxes in front of their name and click on Delete (A popup confirmation message is displayed).
You still have unanswered questions ? Ask us.
Give, get, ask…
Join our community of users to share your knowledge and good practices.


